Hi there,
The title is a little misleading I must confess. It wasn't an old shirt. I have had it for about 2 years (that's not old to me) and I really liked it. It was really pretty with 3 roses on the left shoulder and a belt which gave it that baby-doll-dress look.
Things were going fine with us until one fateful day while I was ironing. My mind drifted and before I could say "kai iron!" the shirt was ruined. Just like that! I tried to remedy the situation by moving the roses from the shoulder to the burnt spot as you can see in the photo above but after a few wears I saw this:
I had two options: First was to throw the whole shirt away and second was to use it for something useful. After thinking for a while the answer came to me. The shirt had a belt and 3 roses, perfect for a cute headband. So here's what I did:
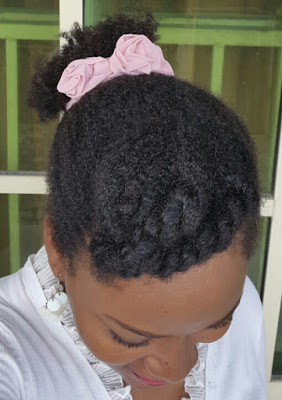
Here I am rocking my new headband in three ways:
You could do the same if you have any ruined clothes. You can also make the roses yourself if your ruined clothing doesn't have any. With just a little imagination you can create something truly beautiful for your fro.
Thanks for stopping by...
KimB
The title is a little misleading I must confess. It wasn't an old shirt. I have had it for about 2 years (that's not old to me) and I really liked it. It was really pretty with 3 roses on the left shoulder and a belt which gave it that baby-doll-dress look.
 |
| Isnt she lovely? |
 |
| The hole was expanding. |
 |
| I cut out the roses and removed the belt. |
 |
| Then I carefully sewed the roses on the belt and it was ready to use. |
 |
| With my uncombed fro. |
 |
| With my messy afro puff |
With my twisted bang and bun do.
 |
You could do the same if you have any ruined clothes. You can also make the roses yourself if your ruined clothing doesn't have any. With just a little imagination you can create something truly beautiful for your fro.
Thanks for stopping by...
KimB

That's one pretty shirt. Thank goodness you thought of what to do with it. Nice hairband.
ReplyDeletehttp://epiphany29.com/talk-thursday-relationships/
Thanks Grace. I was pained at first but I'm glad I found use for it.
DeleteGreat work dear. DIYs are always fun.
ReplyDeleteThanks a lot. I agree wholeheartedly about DIYs .
DeleteGreat work dear. DIYs are always fun.
ReplyDeletewow...so inspiring....and it looks perfect!
ReplyDeleteomajoe.blogspot.com
So creative! And so pretty. Love how you adapted it to different hairstyles
ReplyDeleteLove this. Very creative
ReplyDeleteLeeznijis.blogspot.com
Nice one....
ReplyDeleteFor some reason when I see DIYs like this the first thing that comes to my mind is Proverbs 31 woman. Lol. Thanks for the tutorial.
ReplyDeleteLol. Thanks for your kind words.
DeleteLol you really put it to good use. Nice blog
ReplyDeleteThanks alot
Delete